.png)
The process to set up a custom domain from Cloudflare is short and simple.
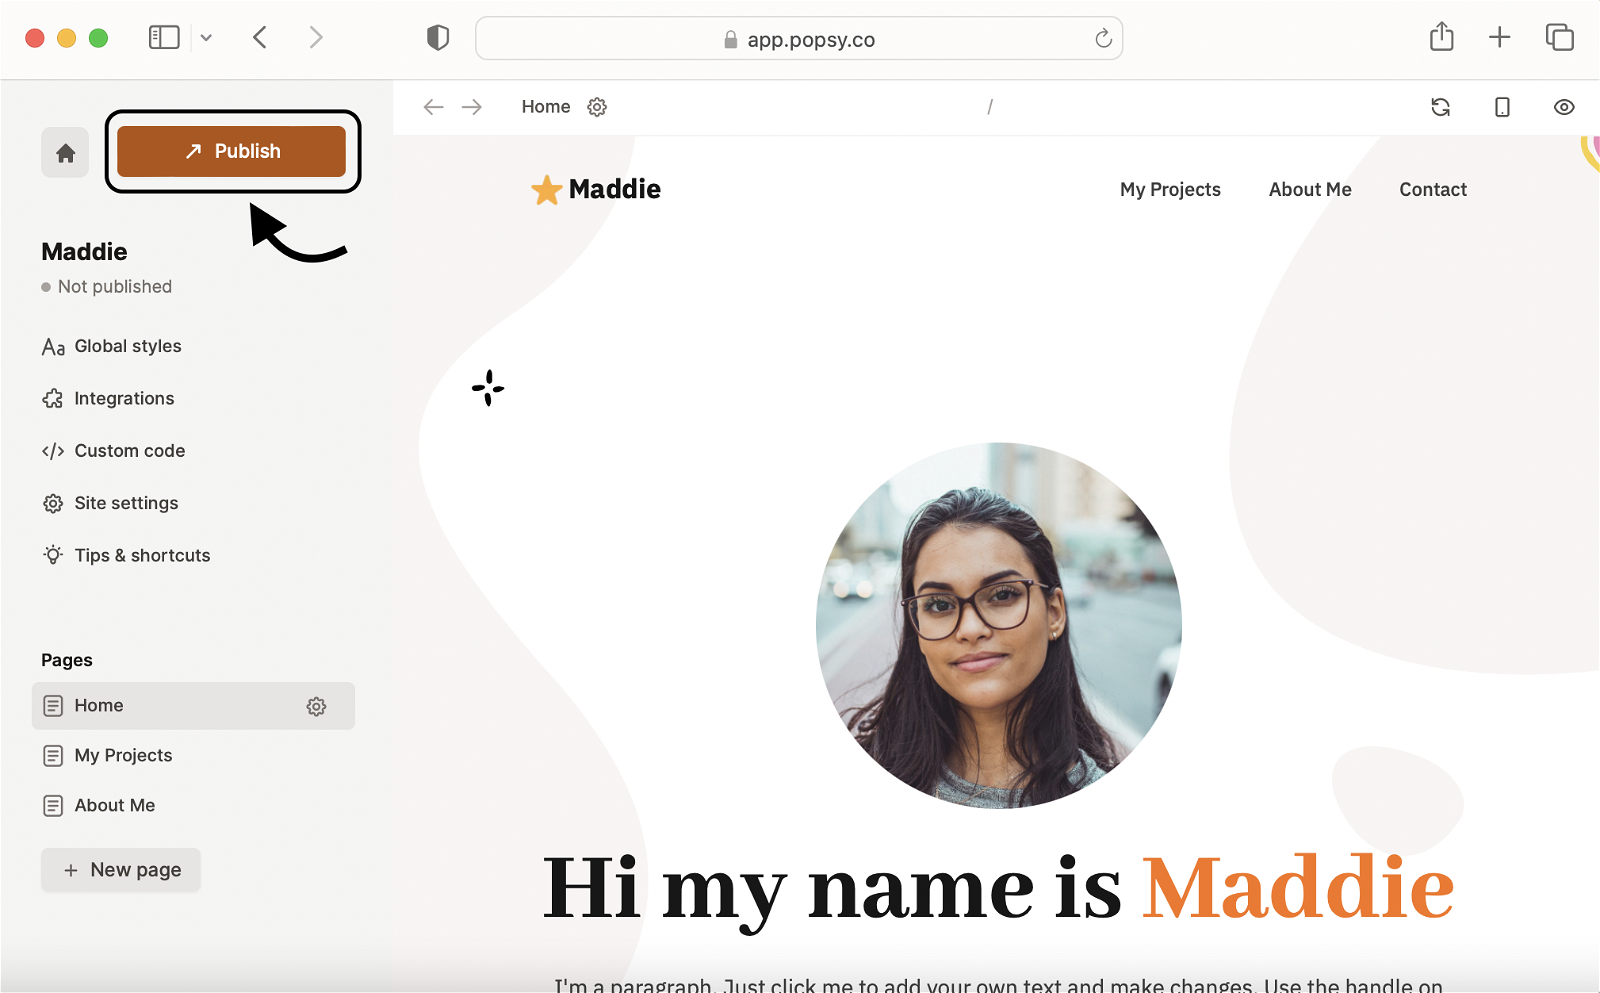
Step 1:
Create your site on Popsy and click the Publish button on top.
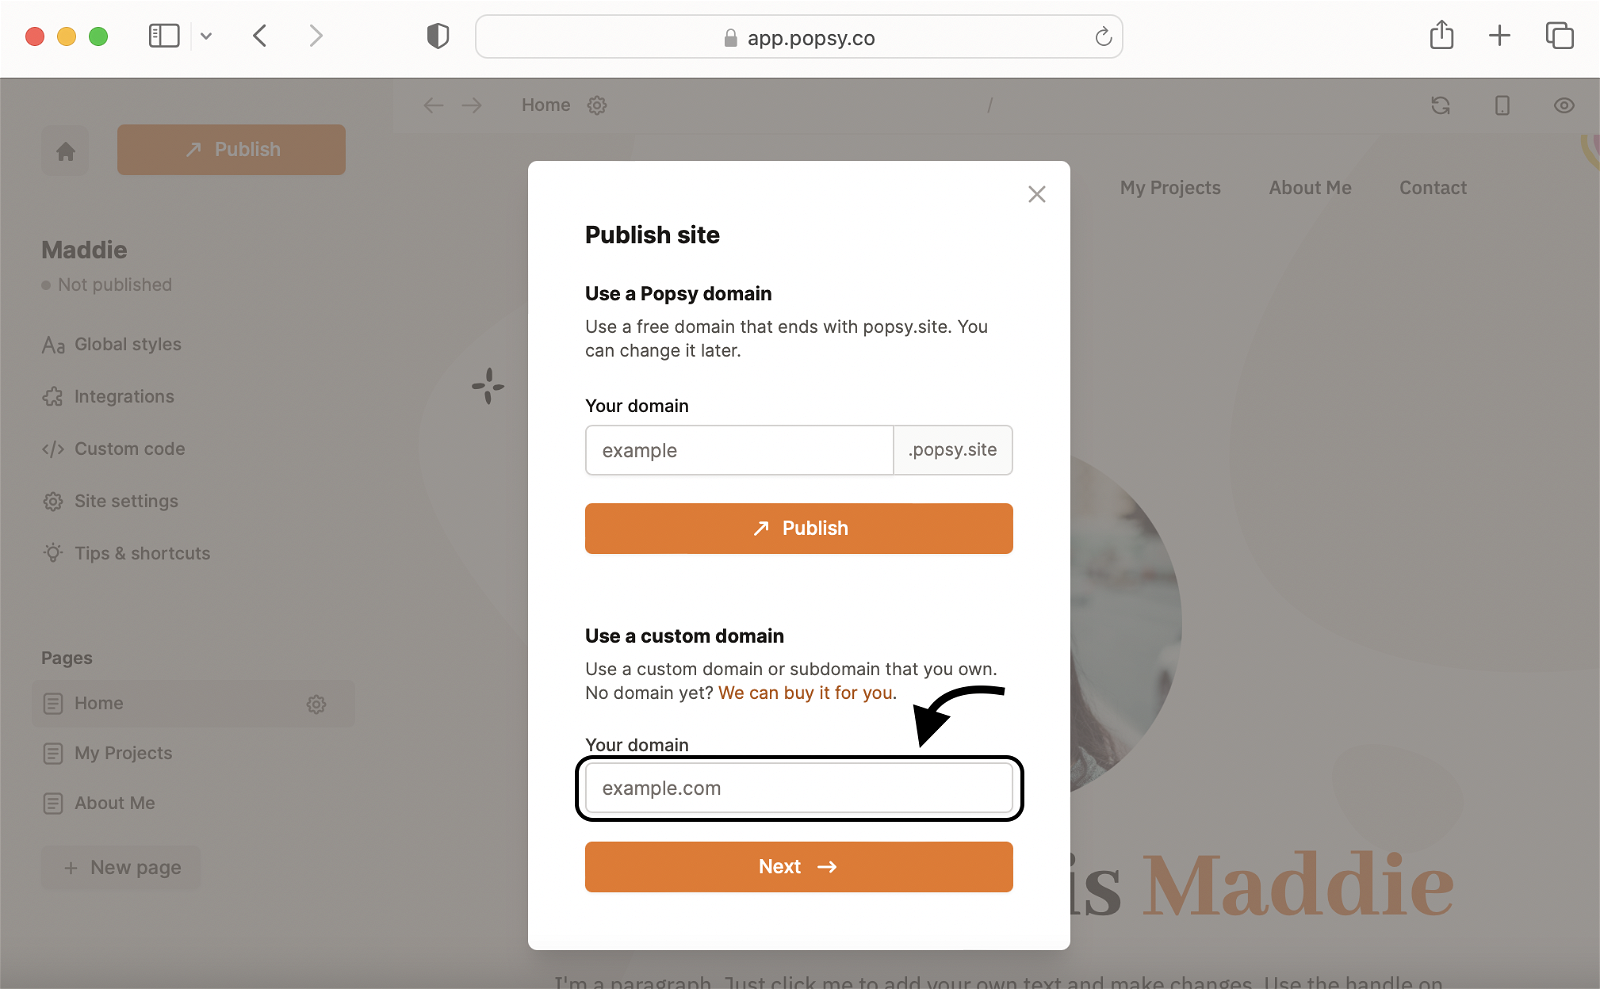
Step 2:
Enter the domain that you bought on Cloudflare and click Next.
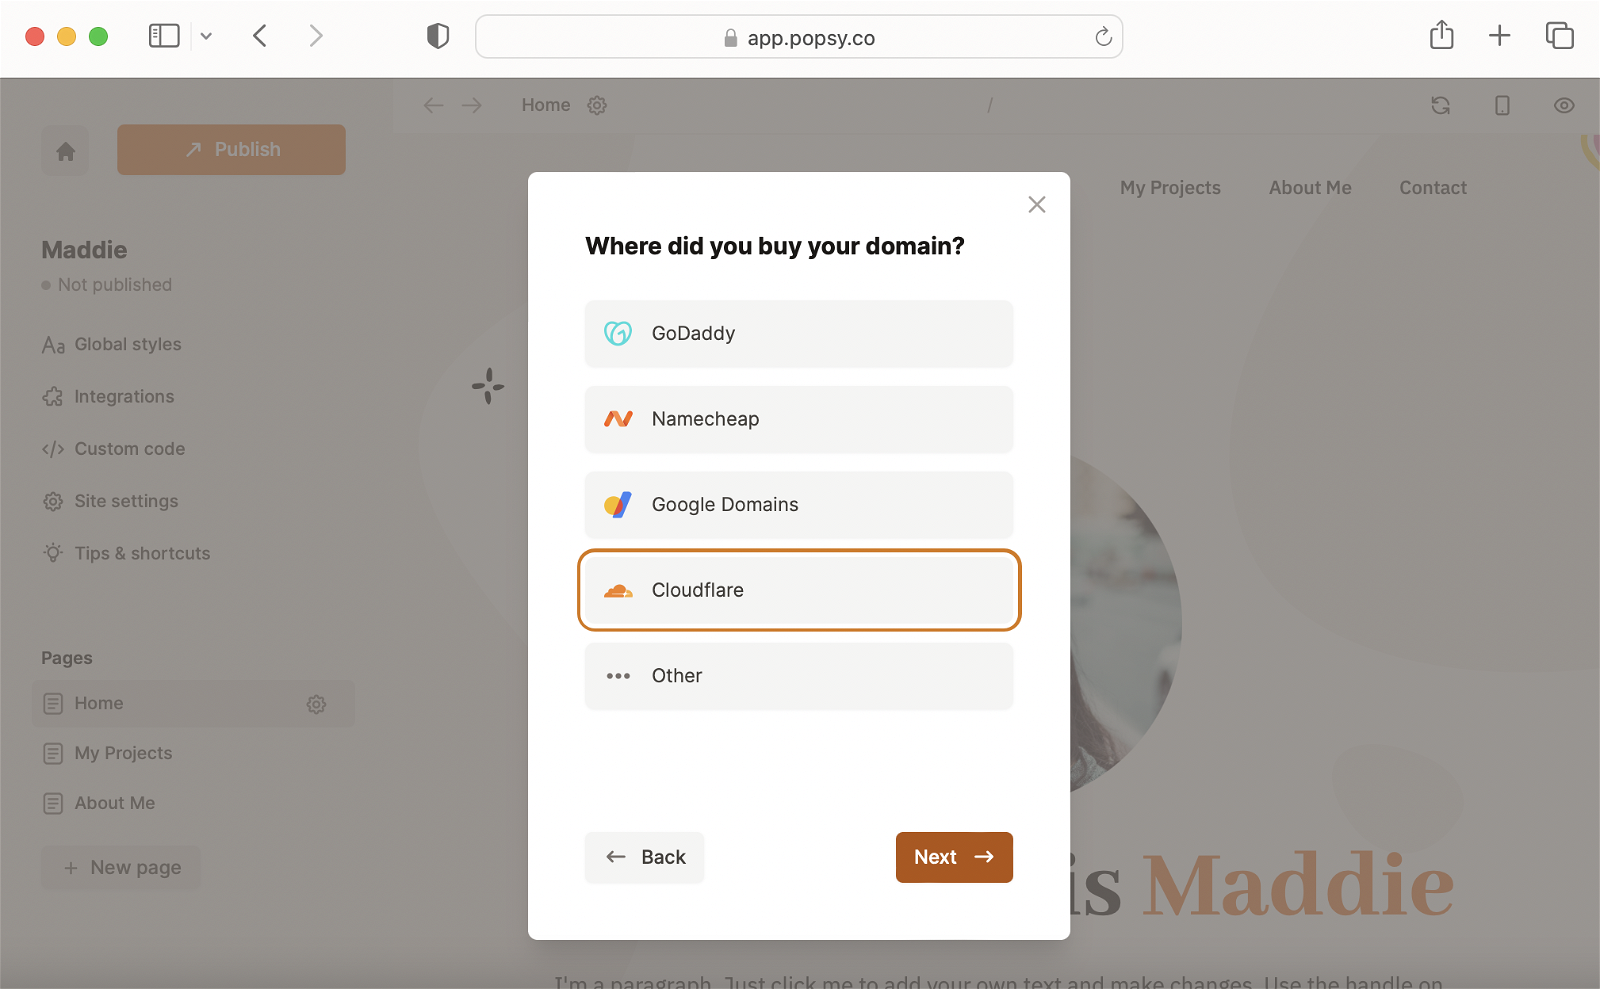
Step 3:
Choose Cloudflare from the list of domain providers and click Next.
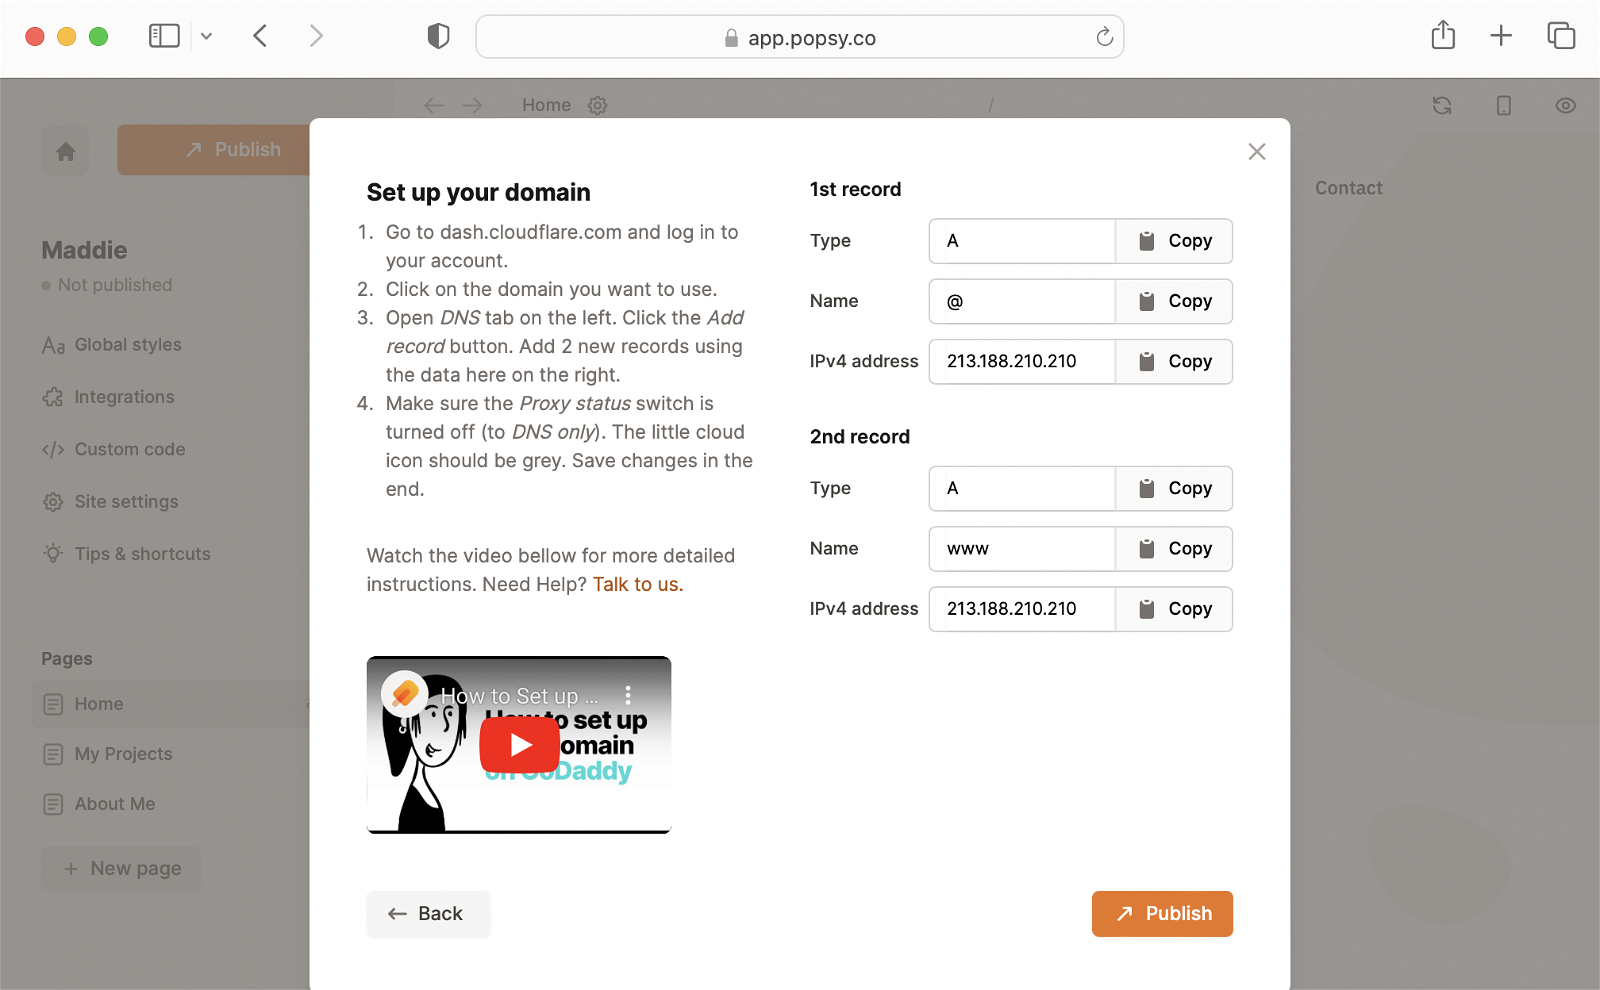
Step 4:
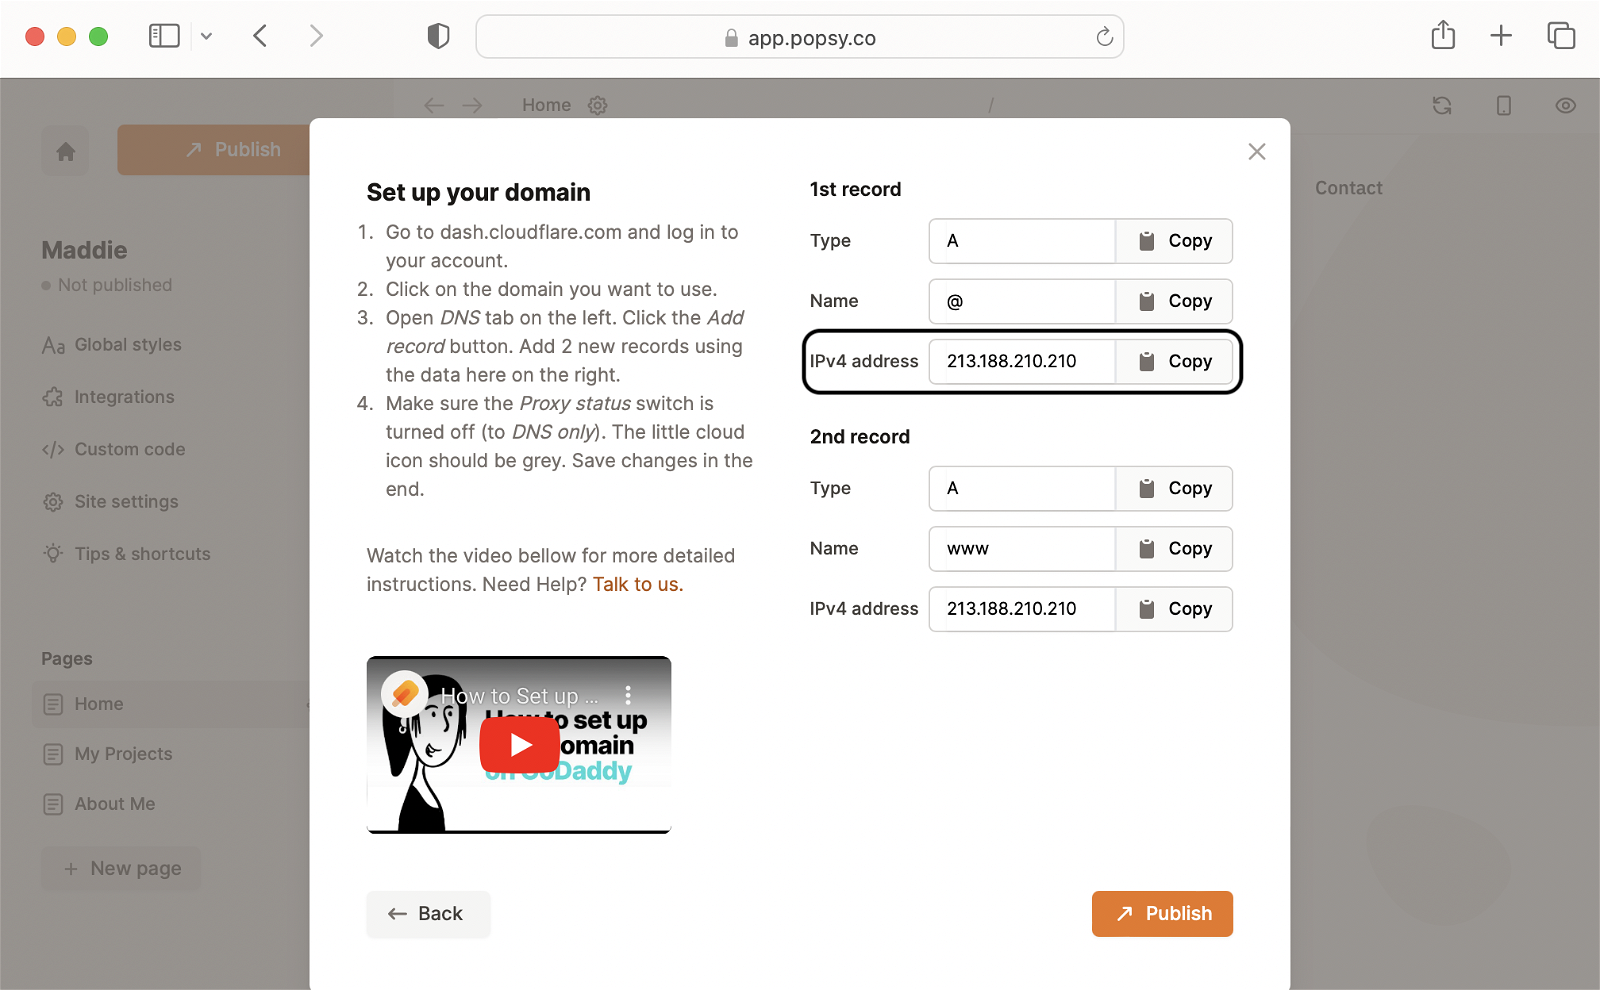
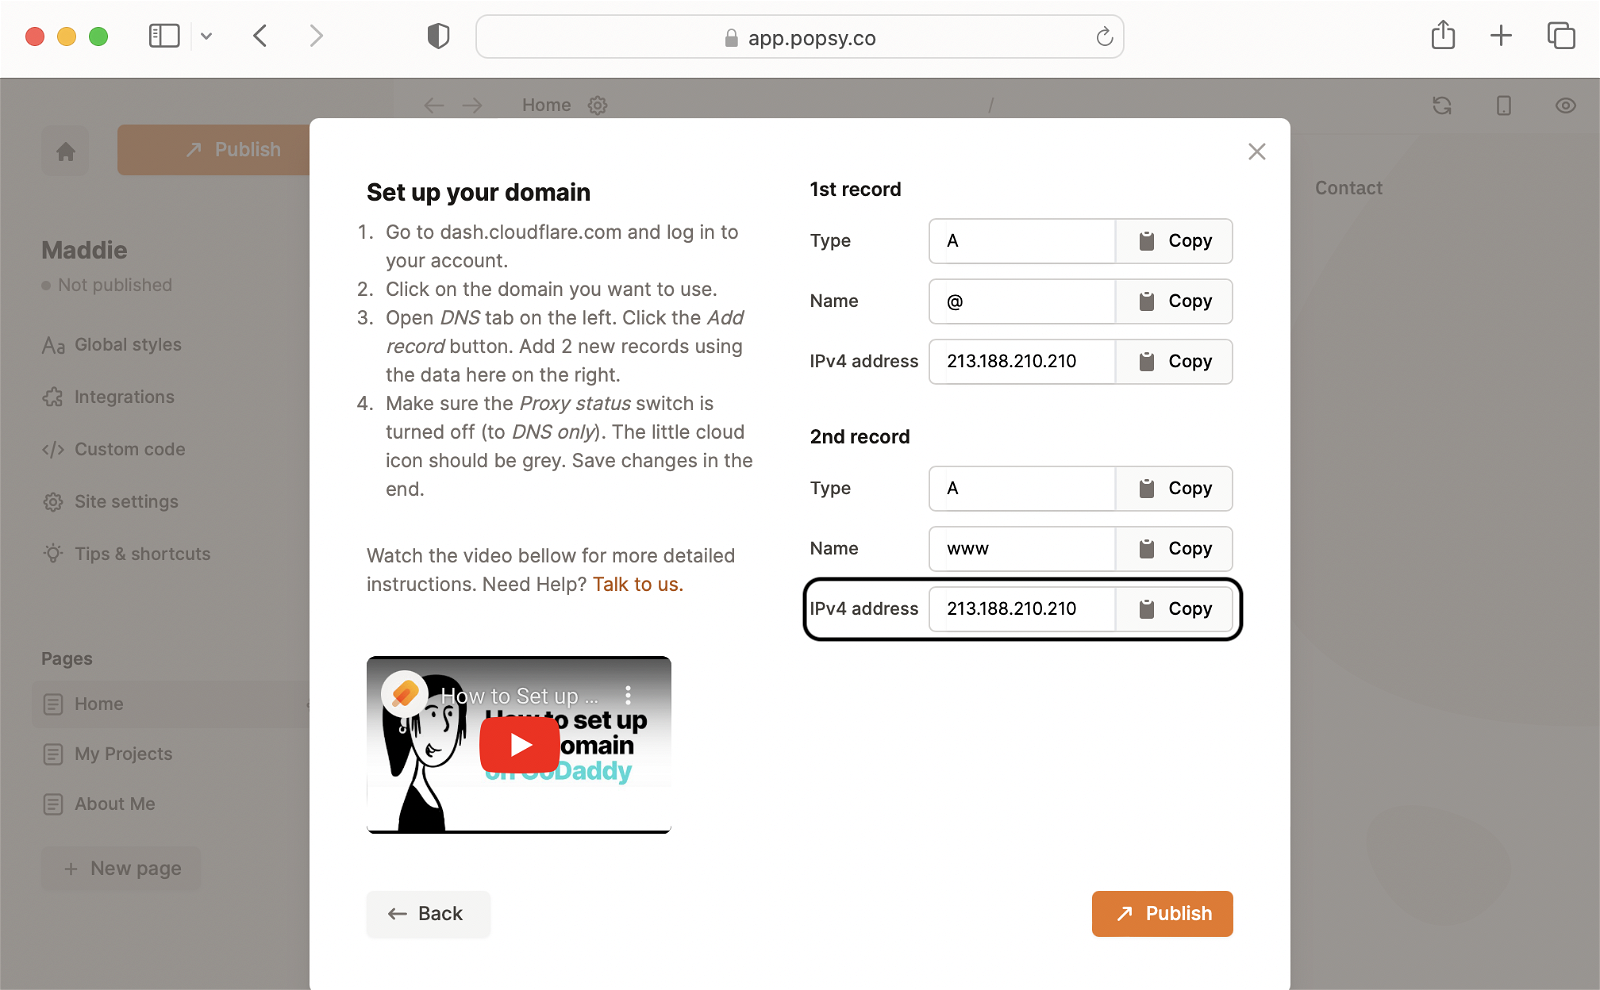
You will see a list of 2 records on the right.* These are so-called DNS records that you will add to your domain on Cloudflare in the next steps.
*If you are using a subdomain (like: subdomain.mydomain.com) then you will only see 1 record.
Step 5:
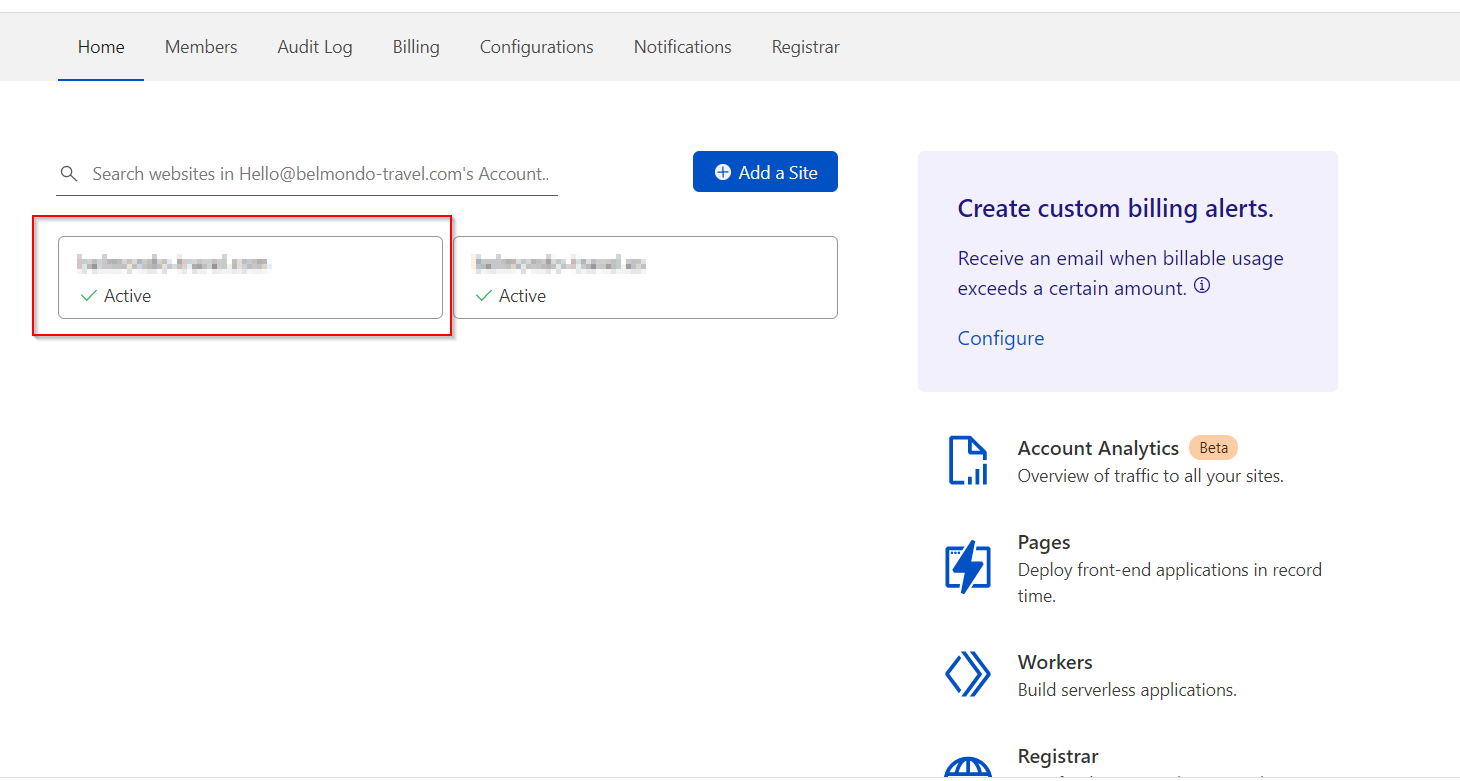
Open a new tab in your browser and go to Cloudflare. Log in to your account and open the domain you want to use.
.png)
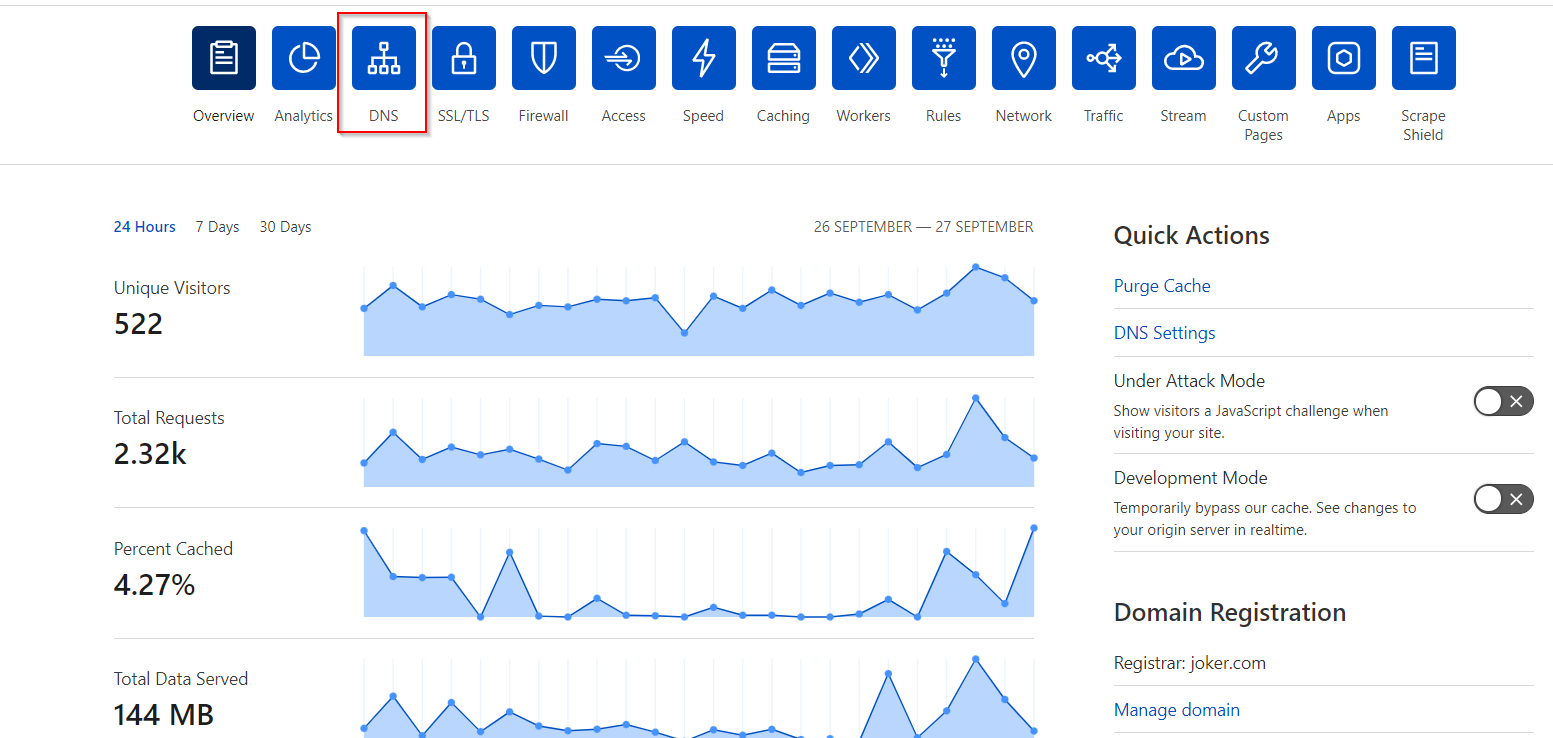
Step 6:
In the dashboard, click on the DNS icon.
%20(1).png)
Step 7:
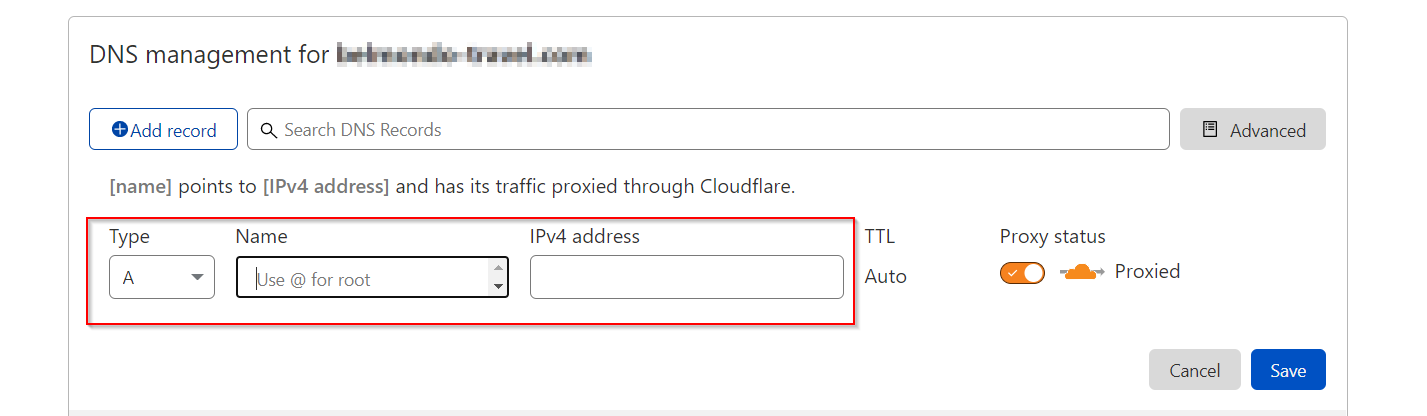
Under DNS management, click on Add record.
.png)
Step 8:
Go back to Popsy and copy the value under the 1st record.
Step 9:
Go to Cloudflare. Choose option A under Type and type in @ under Name. Paste the value you copied from Popsy under the IPv4 address. The record is now set up.
Make sure the Proxy status switch is turned off (DNS Only). The little cloud icon should be grey.
%20(1).png)
Step 10:
You have to do the same for the 2nd record.*
On Cloudflare, click Add record again. Choose option A under Type, and type in www under Name. Copy the value under the 2nd record on Popsy and paste it under the IPv4 address. Make sure that Cloudfare Proxy Status is set to DNS Only (not proxied). The icon should be grey.
*If you are using a subdomain (like: subdomain.mydomain.com) then you only need to set 1 record.
Step 11:
Click Save on Cloudflare, go back to Popsy, and click Publish.
You are done! 🙏

The publishing process usually takes a few minutes, but in some cases, it can take up to 24 hours.
This tool can be used to check if the records are set up correctly: https://www.whatsmydns.net/.
If you encounter any issues contact us at hello@popsy.co.